Monday, September 12, 2011
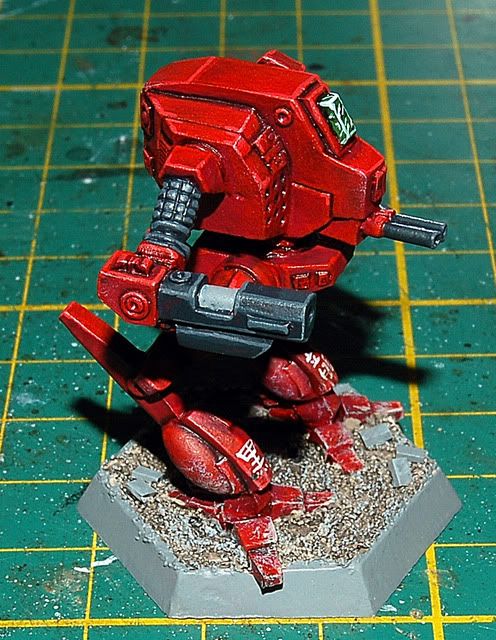
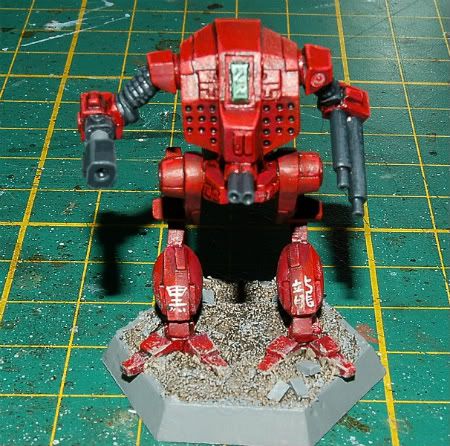
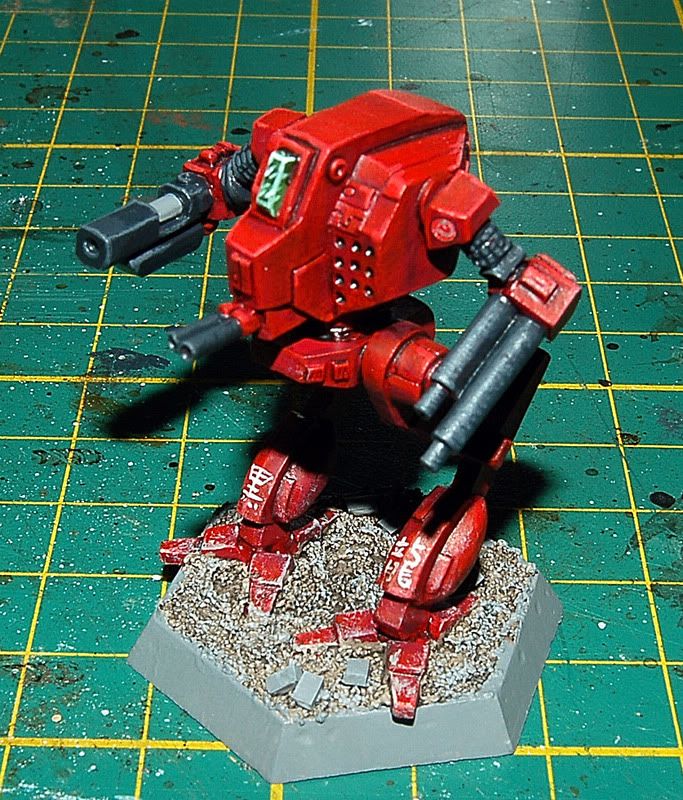
Nova Cat mechs ready for action!
Hey all,
just a few photos of some Nova Cat mechs for a customer. Enjoy, and follow the link to the photobucket album for the rest of the pics on this project!
http://s131.photobucket.com/albums/p306/Tank_Santa/Battletech/
Friday, July 15, 2011
More progress on Kampf. Bake force...
Hey all, just a quick update on the Kampf. Bake forces, things are looking good with just a few niggling details.
The rest of the pictures can be viewed here: http://www.flamesofwar.com/Default.aspx?tabid=126&aff=10&aft=530639&afv=topic&afpgj=3#847349
Also, there will be some new Battletech pics of some Clan Nova Cat and Draconis units we are doing for a customer and our own studio, just waiting for the dastardly FPG decal order...
Keep on the lookout!
Friday, July 8, 2011
Firestorm Battletech: Conventional Vehicles
To tackle the large amount of conventional military and support vehicles we wanted to have, there needed to be a way to make them less record intensive during games. Granted the modern fusion engine vehicles will remain using their record sheets representing very advanced equipment as they should. The vehicles I am hinting at are the less advanced units like standard Main Battle Tanks, APCs, IFVs etc... So how do we make them simple enough to not need a record sheet, but complex enough to work in Battletech? Something came together with a little group brainstorm faster then we thought possible. In order to remove the record sheet for each conventional vehicle we had to decide on a way to represent damage in an abstract fashion. We also needed to represent armour without keeping track of its condition. We moved outside the normal game mechanics for this area.
Nation: Parent nation that the specific conventional vehicle belongs to for the purpose of the Luthien campaign.
Movement: To hit a conventional vehicle is still as normal, and the vehicle has simple Cruise and Flank speeds assigned in its stats for use in determining modifiers. Normal movment rules apply for the vehicle motive type which should be obvious based on the model.
Armour: Conventional vehicles will be assigned an armour save value rolled on 1D6. When a vehicle is hit with any weapon, an armour save is made. If the roll is equal to or higher then the vehicles save throw stat it has managed to avoid any form of serious damage from the hit or was a near miss. If it fails the armour save, the shot has penetrated the vehicle. Ex; A vehicle with an armour value of 4+, will stop any shot on a roll of 4 or higher on 1D6. If it rolls lower then 4, the shot has penetrated the vehicles defense.
Penetrating Hit & Firepower: Once a vehicles armour has been passed, it is considered stunned or motive damaged in some way, this is called Shaken. The size of the weapon that hit the vehicle or its DV (Damage Value) is now a very big consideration in if the vehicle lives through the experience or not. So, the vehicle failed its armour save, and the weapon must now make a firepower check. A firepower check involves 2D6 rolled and compared to the weapons damage value. If the combined roll is equal to or under the total damage value of the weapon, the vehicle is destroyed. Ex; A vehicle is hit by an IS Large Laser, and failed its armour save. The weapon has a DV of 8. The player who fired rolls 2D6, and totals the combined amount. If the roll is 8 or less, the vehicle is destroyed. If the roll is 9 or more, the crew has been shaken or the vehicle disabled, but not destroyed.
Obviously from the example above, there are weapons that are too powerful to fail a firepower roll, especially since the 2D6 Firepower roll can't exceed 12. When a conventional vehicle is penetrated by such a weapon, it is automatically destroyed. Weapons that use the cluster table (ie: Missiles) use the total damage of the entire salvo to determine the firepower roll required. Weapons that cause heat damage, will automatically penetrate armour and cause a Shaken result regardless of if the weapon passes its firepower check or not.
Conventional Weapons, Range & Equipment: Vehicles have a basic weapon stat line, as well you should note no ammo is listed. They are not expected to live long enough or be decisive enough to need that sort of record keeping. The stat sheet does provide you with the required information to use that weapon however within the Weapon, Range & Special Rules columns where required.
Some vehicles will use standard battletech equipment in an abstract fashion. Otherwise they will function as normal. They will be noted where they are needed.
An example vehicle stat line is below. Note the AC12 is a fictional weapon not in the normal listing of the Total Warfare rules, but wit a simple stat line it is easy to work in:
Vehicle Name/Type | Nation | Movement | Armour | Weapon | Range | Special Rules |
M1A2 TUSK Abrams MBT | DCMS | C5/F8 | (3+) | AC12/*D12 | S 1-6/M 7-12/L 13-18 | Reactive Armour (Half missile DV for Firepower) |
Machine Gun, AP MG |
Thursday, July 7, 2011
Blogger is finally working, and an update!
Hey all,
sorry for the long delay,Blogger has been reluctant to let me do anything until the last couple days. So heres a quick update. The German armour presented here is an in progress work for a Kampf. Bake in January 1944 on the Eastern front. Not too much left to do on these, and the infantry will follow shortly.
Decals and marking need to be added along with some small details and final weathering. I am enjoying the winter look though.
Monday, June 6, 2011
BATTLETECH: Black Dragon Avatar
Hey all,
here is the second Black Dragon unit ready for action. The 2nd Sword may have been under equipped after taking combat losses earlier against the Ghost Bears, but the machines they do have are first rate.
This is an Avatar Prime (Omnimech), done with an urban base theme, as will be the case with all Luthien units. Once again the red highlights are not contrasting enough to really show in the photos :S I also noticed spots where the red is showing through the dark grey, I'll fix those shortly.
More on the way, Enjoy!
Wednesday, May 25, 2011
Commission Space Available. Apply now!
Just a quick update to let people know of commission space that has opened up in our schedule. If you have been waiting for us to get some free space for your project, submit your ideas now. Space is limited and will be first come first serve.
Thanks to all our customers for helping make Tank Santa what it is today!
The Studio Team
Thanks to all our customers for helping make Tank Santa what it is today!
The Studio Team
Sunday, May 22, 2011
FIRESTORM BATTLETECH: Force Construction
*6th Bejamin, and 40th Dieron have been added for guidelines, and all units now show a recommended mechwarrior skill level.
When generating your core force Lance for each game, use the random assignment tables recommended in Jihad Turning Points: Luthien. I have presented some guides below so you can narrow the unit selection down a little. Firestorm Markers that require random generating can use the same method.
Izanagi Warriors/Otomo (Loyalist) Firestorm Marker Only
Sorenson's Sabres (Loyalist) Firestorm Marker Only
Both the Otomo/Sorenson's Sabres and Izanagi have a large supply of Clan Tech. If a player chooses he may use an Inner Sphere mech design with mixed tech, or they may swap the mech for a Clan Mech design of one lower weight rating then the unit it replaces. ie; An Inner Sphere heavy mech being swaped out for a clan design would be chosen from the medium weight catagory of either the Ghost Bear, Nova Cat or Smoke Jaguar Assignment tables, and probably front line grade units. Their pilots use the Elite/Veteran rating.
1st Genyosha (Loyalist) Core Force
The Genyosha are a heavy unit. A core force Lance from the 1st Genyosha should contain 1 Assault Mech, 2 Heavy Mechs and a single Medium mech as an average. Because of their high perportion of Omni units, at least 2 of the Lance members should be in an Omni-mech. This unit uses many House Davion designs as a show of cooperation between the two nations, so at least one mech should be generated from the Davion chart. A single mech in the Lance can use mixed tech, or a single mech may be swaped for a clan design of equal weight class or lower. Use the Smoke Jaguar, Blood Spirit, Ghost Bear or Nova Cat assignment tables for the clan design. Their pilots use the Elite/Veteran rating.
14th Sun Zhang Cadre (Loyalist) Firestorm Marker Only
The 14th is still recovering from a hard losing fight with Clan Ghost Bear during the last war. The units equipment should be represented with Modern Medium Inner Sphere designs, and only trace clan tech. Because these pilots are cadets and young warriors, this unit uses the Green rating.
2nd Sword of Light (Rebel) Core Force, (Loyalist Firestorm Marker)
A core force Lance from the 2nd sword of light should contain 1 Assault Mech, 2 Heavy Mechs and a single Medium mech as an average. Because of their high perportion of Omni units, at least 2 of the Lance members should be in an Omni-mech. Clan tech should only be present on a single machine within the Lance. Most machines should be current front line gear. Their pilots use the Elite/Veteran rating.
Sathan's Snipers (Rebel) Firestorm Marker Only
The Snipers prefer quicker medium weight mechs to more bulky units. Try to stick with units generated from the Mercenary and Periphery charts. They also have an affinity for direct fire weapons that do heavy damage at range, hense their units name. Also note, this unit has no omni-mechs, no clan tech and very little current battlefield equipment. Use 3025-3055 designs when generating this unit. Pilots use the Veteran rating.
6th Benjamin Regulars (Rebel) Firestorm Marker Only
The 6th has very few omni-mechs, and very little clan tech. The unit also is less then 50% upgraded with the most modern Inner Sphere technology. Units should be generated from 3050-3058 technology, and usually medium class mechs. Their pilots use the Regular rating.
40th Dieron Regulars (Rebel) Firestorm Marker Only
The 40th has very few omni-mechs, and very little clan tech. The unit also is less then 50% upgraded with the most modern Inner Sphere technology. Units should be generated from 3050-3058 technology, and usually medium class mechs. Their pilots use the Veteran rating.
Word of Blake 9th Division Core Force
The Word of Blake units use a combined arms approach right down to their basic core formation. This force will deviate from the Lance size as a minimum unit for a core, as a Blakist formation is 6 units known as a Level II.
When building a Level II, it should have at least 1 infantry element (Battle Armour Platoon or Mechanised Infantry Platoon), 1 Conventional Armoured element (MBTs or Armoured Combat Vehicles), 1 Support unit (Artillery or VTOL unit) and 3 mechs of various sizes, but should remain 2 medium mechs and a single heavy mech in perportion. Any Medium mech may be swaped for a light mech. You may choose to swap the Heavy mech for an Assault mech.
The 9th has no Clan Tech and no Omni-mechs, but is fully equipped with the most modern Inner Sphere units. Their pilots use the Veteran rating.
ROM Light of Mankind: Epsilon Element (Firestorm Marker Only)
A Level II all mech formation. These units should have no Clan Tech, or Omni-mechs, but are 100% Modern Inner Sphere Designs. Their pilots use the Elite rating.
Word of Blake 9th Division Reinforcements 3068-3069 (Firestorm Marker Only)
The 9th has no Clan Tech and no Omni-mechs, but is fully equipped with the most modern Inner Sphere units. Their pilots use the Veteran rating.
FIRESTORM BATTLETECH: General's Phase
The General's Phase is where all the strategic level decisions get made, and orders to the commanders are given.
Order One: Planning Phase
1. Plan Your Stretegy - Each General must decide what his forces key objective are in addition to the obvious ones. The Black Dragon rebels and the Loyalist DCMS forces are both eagre to control the Imperial Palace Grounds as an obvious symbol of Combine government. The other must control facility is the 'Voice of the Dragon' complex, where all citizens of the combine hear messages from the coordinator. The Black Dragons use it to spread their propoganda and urge for their reinforcements, while the Loyalists need them silenced.
The Word of Blake on the other hand is rather secretive in their agenda, leaving their specifc goals and mission objectives up to the Generals discretion.
2. Write Your Battle Plan
3. Brief Your Commanders
Order Two: Battle Step
See Commanders Phase.
Order Three: Strategic Phase
1. Air Allocation - Tactical Air Mission Assignments may be conducted in initiative order by all Generals. This includes Interdiction & Close Air Support assignments.
2. Make Exploitation Moves - Units in Bad Condition (Red) may not make exploitation moves.
3. Bring In Reserves/Reinforcments
4. Make Strategic Moves - Units in Bad Condition (Red) may only make a strategic move into a hex not bordered by an enemy controlled hex.
5. Total Your Victory Points
FIRESTORM BATTLETECH: The Battle Phase
Before I get rolling, I want to touch on an idea for ease of play and campaign flow. When it comes to Battletech, there are no set army lists. Because of this, a players core force will change from battle to battle as it is randomly generated before the game begins. In order to insure that everyone hs enough to play, and there is always an opponent to play, I suggest you pool your available models. At the studio we will have ample selection of miniatures for every faction involved which are pooled for use by any player when required. Because this variety may take many people and their individual collections to achieve in some groups, communicate between eachother and work together to build a club force pool. This ensures that even if one person does not show up on a given week, there is still enough models for any other person to play and use the faction when required. It is quite easy for a 3 or 4 person group to make a few extra lances for general use. Moving on...
In every Firestorm Campaign, there is a sequence of events that every player must complete in order, each campaign turn before moving on to the next turn. This sequence is called the Battle Phase. This is close linked to the same idea as the General's Phase which we will touch on later. Assume this all refers to the campaign era between 3068-3069 for now.
The steps in the Battle Phase are as follows below:
Order One: Manouvre Step
1. Select an opponent - For this step you can play a game against anyone who is currently standing around picking their nose or otherwise not being productive.
2. Roll for Initiative - This remains as is, although there are more then 2 factions, so each faction commander rolls 2D6 to determine initiative. If the roll is a tie, the Word of Blake player wins the initiative. (Represents that nobody knew what they were up to.)
First campaign turn, the Black Dragon Commanders have a +1 to their rolls.
3. Place a Battle Arrow
4. Choose Firestorm Troops - Special conditions for areas containing strategic points ie; bridges and airfields etc... will be detailed later. Certain Firestorm markers could represent a variable mix of forces vs a specific unit. See each markers description for this information.
5. Check for Supply Status - Because a city has many routes of travel on the surface, above and below the ground, being in supply remains fairly straight forward. Any city hex is in supply as long as it remains directly connected to another city hex that is in supply and not cut off from a supply depot hex. Non city hexes, and city hexes with Bridges follow the normal rules for supply in the Firestorm Rulebook.
Force Condition is directly related to the effects of being out of supply, and therefore replaces the Out Of Supply table in the Firestorm Rulebook. Also, even though Battletech lacks an in game morale system, troops from units rated as Fanatical will always fight to the death when defending and out of supply.
Airborne Supply will still have a roll in Battletech as presented in Firestorm: Market Garden, but I will explain that later.
Order Two: Combat Step
1. Identify your Mission - A set scenario list will be made available shortly, but you can choose to use those in Jihad Turning Points: Luthien if you would like. I will be using more Flames of War influence when modernising the Battletech scenario format in my list.
Air support both conventional & aerospace will be allowed to be used in support on any hex, including city tiles. However, no air support will be allowed in supply areas as they will be too well defended by AA units, unless being used in an interdiction role.
2. Play a Game of Battletech - Other then needing to generate your core force with the campaign charts provided or with a little GM help, this step goes as is.
Order Three: After Action Step
1. Roll to Destroy Firestorm Markers - The new Battletech scenario pool will use a similar scoring system to the Flames of War scenarios. Therefore this stage can stand as is.
2. Retreat Defeated Troops
3. Advance Victorious Troops
*Note that I may have added steps in addition to the usual to accomdate for some of Battletech's unique requirments. If I did not mention specific changes then it stands as writin in the Firestorm book.
I also take this time to say that everyone who wants to give this system a try should pick up a Firestorm Campaign box set, which is also a cool stand alone WWII board game so you have all the rules required that I do not mention here. You do not require any Flames of War to play the board game version of Firestorm. Available through Battlefront Miniatures.
Saturday, May 21, 2011
FIRESTORM BATTLETECH: Luthien 3067-3074
*Just added remaining Black Dragon Units to the list.
Ok, as of this minute I have compiled a list of all the units and their firestorm markers required. Also listed with each marker and its type are what it translates too when used to support your basic force on the Battlefield during a game. They are below.
During this time I have also decided to break the Luthien campaign up into 3 different battle eras. So essentially there is 3 campaigns within 1 big one which I have roughly titled the phases. The Black Dragon (January 3068-December 3069), Blake Rising (January 3070-December 3072), Zealots & Bears Oh My! (January 3073-December 3074). Each being able to be played as a stand alone campaign, or a linked campaign fighting the entire Battle of Luthien.
Forgive the odd format, just the way it fills in. I will explain my idea for conventional froces on the game table shortly. Once again we can thank Flames of War for an easy solution to a record keeping problem. More on that later though...
Loyalist Firestorm Markers (Januay 1st 3068) Turn 1 | |||
Unit | Firestorm Marker | Map Start location: | Represented Unit: |
2nd Sword of Light (Samurai) | Mech | Random or GM selected Heavy Mech 2G/2P (Elite/Fanatical/House Kurita/A Rated) | |
3rd Luthien Guard | Tank | Roll D6: 1 Light Armour Lance, 2-3 Medium Armour Lance, 4-6 MBT Lance 3G/3D (Elite/Fanatical/Kurita Conventional) | |
71st Mechanized Infantry | APC/IFV | Roll D6: 1-4 Mechanised Infantry Company (3 Platoons), 5-6 Urban Combat Team (Elite/Fantical/Kurita Conventional) | |
14th Sun Zhang Cadre | Mech | 2 Random or GM selected Medium Mechs 5G/5P (Green/Fanatical/House Kurita/B Rated) | |
14th Sun Zhang Aerospace Wing | Aerospace | Air support: D6 Roll 1-4 Slayers, 5-6 Shilones 5G/5P (Green/Fanatical) | |
Izanagi Warriors | Mech | Random or GM selected Heavy Mech [Mixed Tech] 3G/3P (Veteran/Fanatical/House Kurita/A Rated) | |
32nd Luthien Aerospace Wing | Aerospace | Air support: D6 Roll 1-4 Slayers, 5-6 Shilones 4G/4P (Regular/Fanatical) | |
1st Luthien Battlesuit Infantry | Battle Armour | Random Battle Armour Lance 4G (Regular/Fanatical/Kurita) | |
Otomo | Mech | Random or GM selected Heavy Mech 2G/2P (Elite/Fanatical/House Kurita/A Rated) | |
Otomo Infantry | Infantry | Infantry Company (3 Platoons), Anti-mech Trained (Elite/Fanatical/Kurita) | |
Sorenson's Sabres | Mech | 2 Random or GM selected Medium Mechs, or a single Heavy Mech 3G/3P (Veteran/Reliable/Mercenary/B Rated) | |
Reinforcing Loyalist Firestorm Markers (Januay 15th 3068) Turn 2 | |||
1st Genyosha Armour | Tank | Roll D6: 1 Light Armour Lance, 2-3 Medium Armour Lance, 4-6 MBT Lance 3G/3D (Elite/Fanatical/Kurita Conventional) | |
1st Genyosha Infantry | APC/IFV | Roll D6: 1-5 Draconis Combine Mechanised Infantry Company, 6 Battle Armour Lance (Elite/Reliable/Kurita Conventional) | |
1st Genyosha Aerspace Wing | Aerospace | Air support: D6 Roll 1-2 Light Fighter, 3-4 Medium Fighter, 5-6 Heavy Fighter 2G/2P (Elite/Fanatical/Kurita) | |
Black Dragon (Kokuryu-Kai) Firestorm Markers (January 1st 3068) Turn 1 | |||
2nd Sword of Light (Kokuryu-Kai) | Mech | Random or GM selected Heavy Mech 2G/2P (Elite/Fanatical/House Kurita/A Rated) | |
43rd Aerospace Wing: Striking Serpents | Aerospace | Air support: D6 Roll 1-2 Light Fighter, 3-4 Medium Fighter, 5-6 Heavy Fighter 2G/2P (Elite/Reliable/Kurita) | |
Sathen's Snipers | Tank | Roll D6: 1-2 Mechanised Infantry Company (3 Platoons), 3-4 MBT Lance, 5-6 Medium/Heavy Mech 4G/4P(Regular/Reliable/Merc/C Rated) | |
Sathen's Snipers | Aerospace | Air support: D6 Roll 1-2 Light Fighter, 3-4 Medium Fighter, 5-6 Heavy Fighter 4G/4P (Regular/Reliable/Merc) | |
Reinforcing Black Dragon (Kokuryu-Kai) Firestorm Markers (June 5th 3068) Turn 3 | |||
6th Benjamin Regulars | Mech | Roll D6: 1 Light Mech, 2-3 Medium Mech, 4-5 Heavy Mech, 6 Assault Mech (Regular/Reliable/Kurita/C Rated) | |
6th Benjamin Aerospace Wing | Aerospace | (Regular/Reliable/Kurita) | |
45th Marduk Light Armour | Light Tank | Light Tank Lance 4G/4P (Regular/Reliable/Kurita Conventional) | |
Reinforcing Black Dragon (Kokuryu-Kai) Firestorm Markers (February 19th 3068) Turn 6 | |||
40th Dieron Regulars | Mech | Roll D6: 1 Light Mech, 2-3 Medium Mech, 4-5 Heavy Mech, 6 Assault Mech (Veteran/Questionable/Kurita/C Rated) | |
40th Dieron Aerospace Wing | Aerospace | (Regular/Questionable/Kurita) | |
31st Kessel Armour | Tank | Roll D6: 1 Light Armour Lance, 2-3 Medium Armour Lance, 4-6 MBT Lance 4G/4P (Regular/Questionable/Kurita Conventional) | |
2nd Defenders of Asta | APC/IFV | (Regular/Reliable/Kurita Conventional) | |
Word Of Blake Firestorm Markers (January 17th 3068) Turn 2 | |||
9th Division Aerospace Wing | Aerospace | Air support: D6 Roll 1-2 Light Fighter, 3-4 Medium Fighter, 5-6 Heavy Fighter 2G/2P (Elite/Fanatical/WoB) | |
ROM Light of Mankind: Epsilon Element | Mech | Roll D6: 1 Light Mech, 2-3 Medium Mech, 4-5 Heavy Mech, 6 Assault Mech (Elite/Fanatical/WoB/B Rated) | |
Orbital Naval Support: Sword of Promise | *Cmd. Center | Naval Support: Orbit-to-Surface Fire (Pg.103 Strategic Operations) | |
Naval Aerospace Support | Aerospace | Air support: D6 Roll 1-2 Light Fighter, 3-4 Medium Fighter, 5-6 Heavy Fighter 4G/4P (Regular/Fanatical/WoB) | |
Reinforcing Word Of Blake Firestorm Markers (July 30th 3068) Turn 3 | |||
9th Division Reinforcements | Tank | Roll D6: 1 Mechanised Infantry Company, 2-3 MBT Level II, 4-6 Random or GM Selected Heavy Mech 2G/2P [No Omni} (Elite/Fanatical/WoB/B Rated) | |
Reinforcing Word Of Blake Firestorm Markers (January 21st 3069) Turn 5 | |||
9th Division Reinforcements | Tank | Roll D6: 1 Mechanised Infantry Company, 2-3 MBT Level II, 4 Battle Armour Level II 5-6 2 Random or GM Selected Medium Mechs 2G/2P [No Omni] (Elite/Fanatical/WoB/A Rated) |
Friday, May 20, 2011
The Right campaign system for BATTLETECH...
In my efforts to build a campaign system with both detail and simple game mechanics for Battltech over the years, I have found no easy answers. Linked scenarios are too generic, and map based campaigns have so much record keeping it gets bogged down and players lose interest. No matter what method was used it seemed like it was either missing a ton, or could lose a few pounds of pointless details. I had been sitting at my desk with a notepad full of ideas, but none of them were coming together as a whole. The same problem year after year. My favorite game of giant robots blasting each other to bits was seemingly stuck in the limbo of pickup games. I was giving up all hope...
Recently Battlefront Miniatures, the makers of the Flames of War miniature game line, unleashed a simple yet detailed looking campaign system called Firestorm. It uses both a map and playing pieces (Firestorm Markers) to represent specific forces on a certain battlefield for a particular campaign during WWII. The map is divided into territories, many which have point values representing their strategic value to the players. Players each turn roll dice to determine the amount of battles played this campaign round, forcing players to make strategic moves, and avoiding the common turtleing associated with many systems. Each campaign generally lasts 5-8 rounds. The playing pieces used represent additional forces that may be called upon during battles on territories they occupy, to bolster the controlling players forces for the game. These markers can be lost during the course of the campaign, especially during losing battles. The long story short is that usually the player who controls the majority of the strategic map points, wins the campaign.
After playing several campaigns for both eastern and western front I was satisfied with how this campaign system managed to maintain its level of personal control, while making the campaign flow forward. Players were pushed to make calls and moves to maintain their battle line, and further their own forces strategic position. This all happened while making sure there were plenty of games each round, with no shortage of excitement. There are currently 2 of these sets available, Firestorm: Bagration and Firestorm: Market Garden. So how can Battletech and my campaign desires benefit?
FIRESTORM BATTLETECH: Luthien 3067-3074
The Map
By making a Battletech Firestorm campaign of course! So, armed with new enthusiasm I have been tracking down all the parts I need to get my Luthien campaign ready. My first concern before anything else, was a map or game board to represent Luthien. The Jihad Turning Points: Luthien supplement available to download from DriveThruRPG.com, provided a great resource as to all the forces involved, and a rough idea of the battlefield layout. Something to note was that the Battle of Luthien was fought almost entirely within the confines of the Draconis Combine capital city and its surrounding area. Only a few battles of the campaign were outside of this area, so my map did not need to represent the entire planet. I decided to focus on representing just the city itself, with the option to represent other far lying areas of conflict with smaller independant maps. After finding no images already made of the Imperial City and it's layout, I was left with the task of using the rough geographical description provided in the Turning Points guide to make my map. I spent several days drawing up concept layouts and doodles only to realise that to achieve the visual I wanted I would require a far cooler looking map. The answer was provided by a trip to my local store, where I found the hex based campaign tile sets from Games Workshop. Battletech uses hexes in all of its own game mechanics, so the campaign should too. Each hex is a territory to be controled and fought over. The product I mentioned is Planetary Empires and can also be used with Mighty Empires which is a more fantasy or natural world look.
The Markers
Now that I was armed with a really cool 3D element to show off my campaign environment I couldn't just use cardboard counters to represent the Firestorm Markers moving about the battlefield. Lucky for all, Iron Wind Metals has just released Battleforce scale mech miniatures! Just in time to answer my question of how do I represent a mech unit on the map! Available through their web store they already have micro fighters to represent local air support on the map. Its almost too easy... For more conventional forces on the map, I had already decided on using GHQ Micro Armour. Not only does it work well for conventional force Firestorm markers, they also make great minitures during games of Battletech as well.
Representing Forces
So the layout basics were covered and I had a direction chosen, on to the gritty stuff. During a Firestorm campaign every controlled territory is considered to have some sort of forces in it, regardless of if their are Firestorm Markers within that area or not. First I had to decide on a base unit for each faction in the campaign. This unit would represent the base force for every engagment that the faction fought in and therefore would not be represented on board with a Firestorm marker. For the Loyalist forces I picked the 1st Genyosha. At the start of the campaign they are the best equipped and are a fresh unit to the battlefield after the initial rebel strikes. Representing the Black Dragon Rebels is the 2nd Sword of Light, although understrength at the start, supporters of their cause quickly flock to their banner. The Word of Blake contribution will be represented by the fresh arriving 9th Militia. These 3 units will have no markers on the campaign map for their core regiments. Support regiments however such as aerospace support and conventional forces will have markers. Basically this means that in any engagement, all players core forces will be built from one of these units.
All other regiments and support units will be represented on map by firestorm markers, roughly 1 marker for every battalion present on world. Ex; the Black Dragon Mercenary support unit Sathen's Snipers is 2 mixed battalions, and will therefore have 2 Firestorm markers on the campaign map. Seems easy enough. Where things get a little more complex is how big is the base unit for each game, whats in it, and what exactly does each marker used to support your base force represent during a game of Battletech?
Force Composition
With an idea of what everything represents on the campaign map, I now had to decide how big a basic game would be. After reading much of the fiction and the Turning Points notes, Luthien although a large battle with many units was actually fought in a more skirmish like format accross the city. With this in mind I defaulted to the most basic formation in Battletech, the Lance. Each game would consist of at least one lance vs another, supplemented by additional Firestorm markers on either side. Exactly what each Lance contains will be explained in more detail later.
More critical at this time is what will each Firestorm marker used in a game add to the fight. Roughly for now I have decided on what each Firestorm marker is below:
Mech: Single additional mech chosen with the proper chart or by GM for the unit it represents
Tank: Represents a lance worth of conventional armour
APC/IFV: Full mechanised infantry company (Roughly 3 platoons and HQ)
Infantry: Full infantry company (Roughly 3 platoons and HQ)
Battle Amour: Full battle armour lance chosen by GM for proper unit
Aerospace Fighter: Tactical Air Support (explained later)
Now this list is not definitive vs just a guide to get me rolling. Certain units may have additional options and or tweaks made for their markers. ie; Sathen's Snipers use combined arms, so their markers may allow for a mix of unit types in support instead of a specific one. I will tackle this by having a random roll with options to determine the markers specific contents before each game.
The lance size game scale keeps the game at a decent size, and doesn't take all night to resolve for experienced players. On a further note, I will provide a full list of all markers required for each unit in a later article.
Adapting The Rules
Even though Firestorm is a pretty simple rule system, there will have to be substitutions and changes made to suit the Battletech universe and gameplay. Shortly, I will go through each of the various sections of the Firestorm system and modify or edit anything that requires changes, and then note it here on the blog for those interested. Currently I will just get some ideas down, feel free to comment.
Supply lines: Battletech is a game where every shot counts, literally. During a game your Mechs expend ammo in the effort to destroy their enemies. What happens when you are low on ammo and cut off from your lines? What happens when you need vital repairs and components but you can't get either because of the enemy between you and your own forces? Firestorm touches on this subject with its basic mechanics. Battletech I feel, really benefits from the presence of a sound logistical element. Right away I decided that out of supply units will be unable to replenish their ammo or make repairs between games. This will relate also directly to Force Condition below.
Force Condition: As an addition to the normal Firestorm ruleset, I have produced a force condition modifier. Once again I feel that Battletech really benefits from a strong sense of the logistical element. The idea of course is to make sure it remains simple to represent. Every time an attack is made, or a defense gathered, the ensuing battle will take a toll on the forces in that area. Because every players base force is randomly generated or chosen each battle, there is no way to say that this certain mech has sevear damage and this one has light damage or this tank lance lost half its number. Instead of keeping track of each lance that fights in every battle, requiring a massive amount of record keeping, a simple coloured marker system will do the trick. Green, yellow, orange and red markers will help us identify the basic condition of the core force in each hex or territory.
To provide an example, assume the campaign is fresh and the opening moves are being made. Every unit at this stage unless set by campaign condition is considered green. Green areas represent units that are in perfect or near perfect working order and are in supply. These units start each game fully loaded with ammo and no damage. Areas with a orange markers represent a force that is starting to feel the grinding effects of battle, and will start games with minor ammunition loss (25%) and light damage. Areas marked in red show units that are in bad need of repair, and have significant (50%) ammunition depletion. Units marked with a yellow marker represent units that are out of supply. Yellow markers are placed on an area in addition to their current condition. Units out of supply cannot recover from their current condition.
How do they work? When an attack is launched, the attacker and defender can simply look at the Force Condition markers in both territories. If the territory the attacker is attacking from is green, and the defenders territory is green, both forces are in perfect condition with no damage. If the attacker was attacking a defence that had an orange marker, the defenders forces would have to apply random light damage and 25% ammunition loss before the game begins. If the defense was marked red, they would have to apply heavier/minor critical damage and at least 50% ammunition loss. This same scenario applies to the attacker. An attacker can attack with a unit in a Worn territory, but they will be at a significant disadvantage due to already existing damage and ammunition loss. A yellow marker in addition to any other colour present shows the unit as out of supply explained above.
How does a unit go from Good condition (green), to Worn condition (Orange), to Bad condition (Red)? Any time a unit launches an attack or is used in a defensive action, post battle,regardless of the outcome the unit is automatically degraded to worn condition or an orange marker. This represents the force as a whole being engaged in combat that campaign round, sustaining standard battlefield wear. If the unit was already in worn (orange) then it is degraded to Bad (Red) instead. Units in a Bad (Red) territoy may not launch attacks as their forces are too depleted to be combat effective in an offensive.
In order for unit to recover from being in bad or worn condition they must be in supply, and spend an entire campaign round unengaged in either offensive or defensive actions. If the this can be done, the unit recovers one level of condition above its current. (ie; Bad would become worn, worn would become good.) It is possible then for a cunning enemy to keep an opposing force in the Bad (Red) condition through constant attacks. Condition change takes effect regardless of a victory or defeat in a game.
When a defense is forced to retreat into an adjacent hex due to territory loss to an attack, the territory the remaining defenders retreat into becomes one condition level lower then it was previously. (ie; Worn force retreats into good hex, hex become worn.) This effect represents the influx of damaged forces and the strain on the supply chain in that area to keep them serviced.
Finally, any Firestorm markers present of the attacking player and defending players suffer the same conditional problems as their base forces present.
Rebels and Police Forces: Normal Firestorm campaigns generally have forces that are trying to disrupt or maintain supply lines on both sides of the fighting. For simplicity sake, these rules will function very similar to their existing set-up. In a city there are many roads, Railways, subways, and other methods of moving supplies, not covered in the Flames of War version. Instead of blocking a specific road or railway, these forces will block an entire hex or territory instead.
There will be more to come, with a proper document detailing the mods required to work this. Currently I will just be spewing thoughts onto web space.
Sunday, May 15, 2011
BATTLETECH: Battle for Luthien, 3068
Many of you are familiar with the miniature game Battletech I am sure. 30 foot tall robots with pilots known as mechwarriors dominate the battlefields of this universe. This game has been a staple in my group for many years and we have a long fond history of playing it. With a very large and rich back story and multitudes of factions and eras to play, you will never get bored. For years I have wanted to do a grand scale campaign with loads of awesome terrain and tons of units. Unfortunatly with school and other things I was distracted and never got a start on my plans. In the following years I fell behind on events and happenings within that universe.
With more time to invest in personal projects as of this year, I started to catch up on what I had missed in the Battletech storyline. Recently, Battletech has moved into an era of chaos and large scale war called the Jihad started by the Word of Blake. The conflict rages accross the entire Inner Sphere. While reading loads of new source material I came accross the conflict in the Draconis Combine, known as the Battle for Luthien, that nations capital world. The battle caught my attention due to the variety of units and factions that fight for the world between the storyline years of 3067-3074. The best part of all for me was that it is almost all fought within a city! This particular struggle had everything I wanted in a campaign, with liberal room for variable outcomes.
In January this year, I made a decision to start full tilt into this era of the Battletech universe. I have gathered many miniatures, tons of support material, and base objects for full 3d terrain, this project will be featured as progress continues on its development. Be it a single mech or a full modular urban terrain square, it will be posted here. For more details on the campaign that will take place using the items featured here, feel free to contact me. This is a long term project, that may take several years to make ready for the game table, but worth every minute.
For starters here is the first mech off the assembly line. Done in the colours of the Draconis Combine's Second Sword of Light Regiment. This particular sworder has coloured over his Sword of Light emblem, and is now acting under orders of the Black Dragon rebel faction. As the list of painted units gets larger, I will attempt to compile a master mini list on the main page for easy viewing of each piece.
Saturday, April 2, 2011
Commission Space has been booked up!
To all current customers looking for projects or thinking on it, our commission space has been booked up until the end of June. So we are happy to bok projects for after that date but we are currently all full.
Thank you to all our new and repeat customers for creating the start to a record busy year here!
The Studio Team
Thank you to all our new and repeat customers for creating the start to a record busy year here!
The Studio Team
Thursday, January 6, 2011
Commission space available finally! And other news...
Hey all,
anyone interested in starting a project now is the time. For the first time in almost a year, some space in our schedule has opened to take on a few more clients.
So if you have been considering us for a project, drop me a line and we can get things hammered out.
We also have 4 tournament armies that have been started as general projects and never finished fully. We are looking for buyers to finish out the projects and give them a home. A 10% discount will be applied to labour costs for anyone who takes on one of these homeless forces listed below. Contact us for prices.
Italian Beseglieri (North Africa, 1500 pts MW)
3. Fallschirmjager (Hell's Highway, 1500 pts LW)
82nd Airborne (Hell's Highway, 1750 pts LW)
King Tiger Company (River of Heroes, 1750 pts LW)
Also available:
10 T-34/85s, (painted to order)
Thanks everyone!
Subscribe to:
Posts (Atom)